Bleskomat Bills ATM
Once you receive Your Bleskomat Bills it should be fully functional but it is not configured to any Bleskomat account so if you try to scan the QR codes produced by the device they will give you an error.
In order to configure the device to be fully functional you need to either use the Bleskomat Platform, have your own Bleskomat Server or run it with some of the integrations we have done with other projects like LNBits or Umbrel. Here we are going to explain how to do it with Bleskomat Platform.
Platform configuration
In Bleskomat Platform go to Devices > Device Settings
- Reference Phrase - Two random words from Bip39 list used to identify the device.
- Device Type - What Bleskomat device you are configuring.
- Fiat Currency - The fiat currency that the device is going to accept. It requires hardware configuration so it is not possible to only change it here and make it work.
- Exchange Rates - The provider used for the exchange rate that will be done at the moment for each trade.
- Fee Percent (%) - Percentage of the fee that will be applied to every trade. This is how you make money.
- Fixed Fee - A fixed fee denominated in the fiat currency of the device. This is how you make money.
- Custom Invoice Memo Prefix - If set, this will replace the default invoice memo prefix - e.g. Bleskomat (absurd cake). Your ATM customers will see this in the memo field of their wallet application's invoice.
Preparing board for hardware configuration
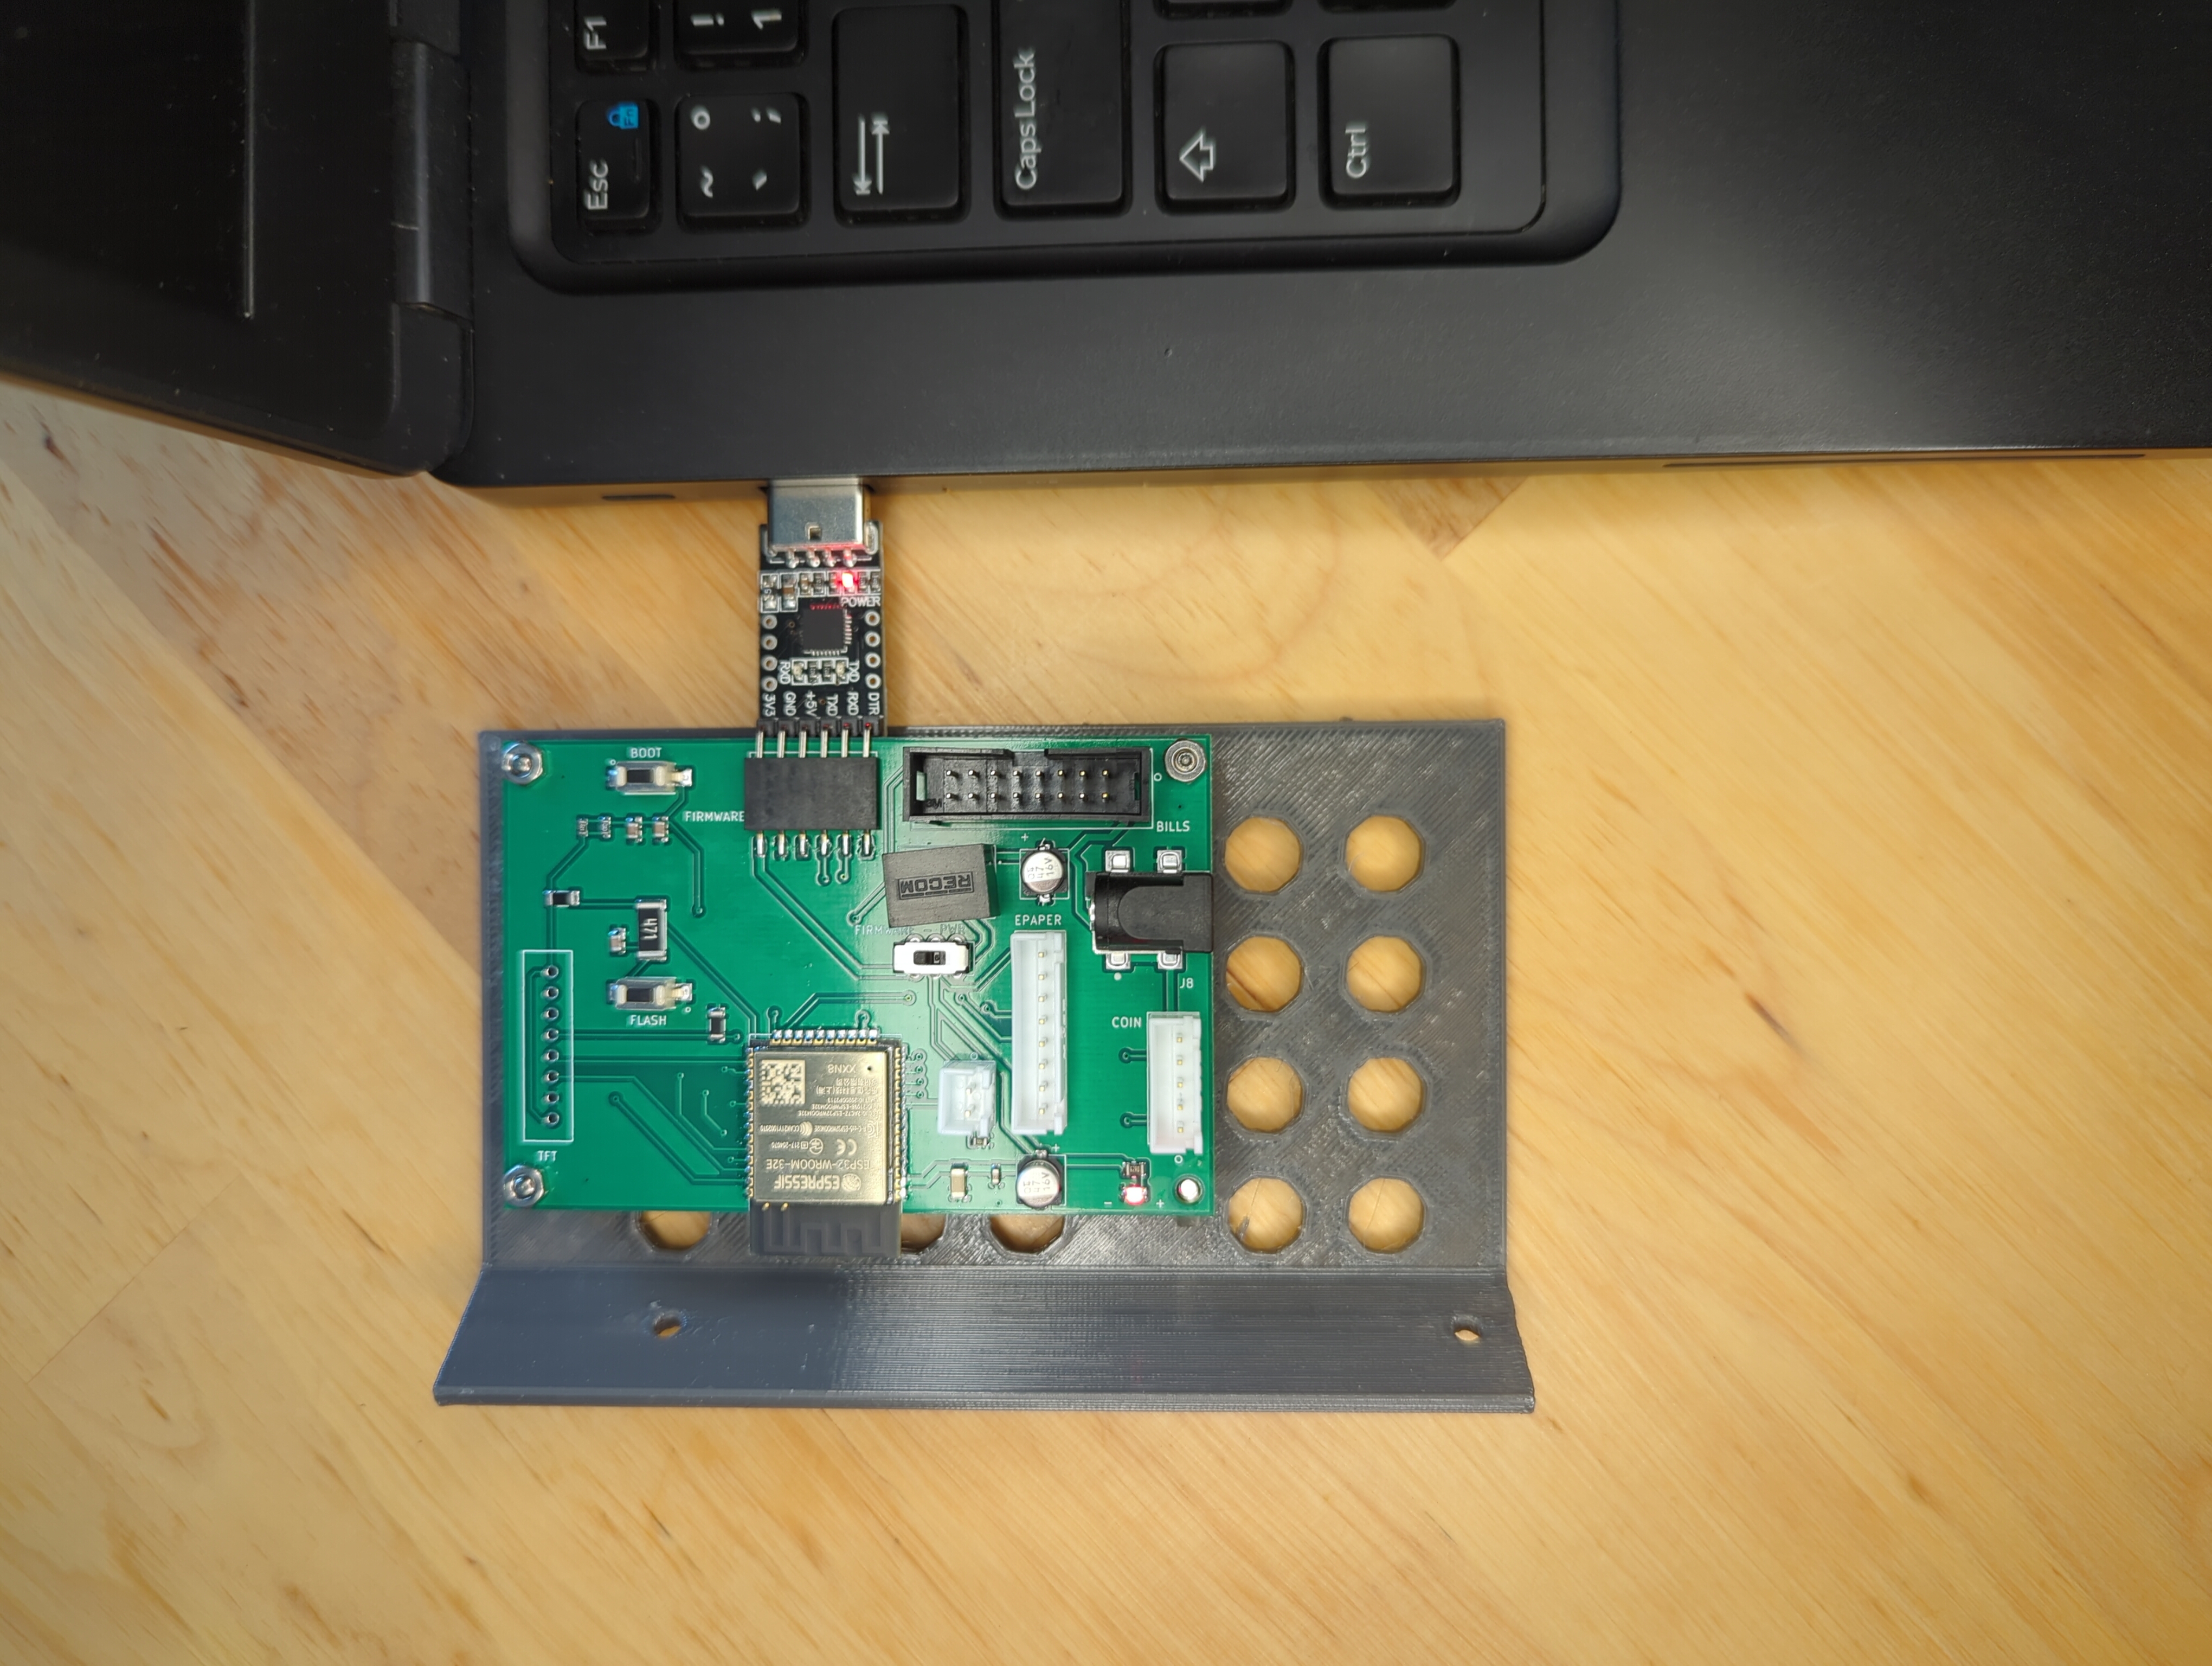
The only think you need, is to take the Bleskomat Board from the case and connect it with USB to your computer using the CP2101 connector that was provided with your device.

You have to make sure that Bleskomat Board switch is set to "Firmware" so we can configure it.
Hardware Configuration from Bleskomat Platform
Once you have the board out of the box you connect it to your computer with USB and the Bleskomat Platform will manage the configurations for you.
- If you are on Windows you should install driver https://www.silabs.com/developers/usb-to-uart-bridge-vcp-drivers?tab=downloads and download the file with name "CP210x Windows Drivers".
- If you are on Linux probably you will have to give permissions to your user to access USB running the command: "
sudo chown ${USER}:${USER} /dev/ttyUSB0"
In the Bleskomat board there are 2 buttons (Boot and Flash). You will be asked to push those buttons during firmware update as it follows:
- Keep "FLASH" button pressed while you pressed and release "BOOT" button. Once the Firmware updated has concluded you should press "BOOT" button alone.
Bellow you can see a vide of how it goes: